
Documentation / Newsletter Pro — version 0.13.1
macAdesign Newsletter Pro
From installation to the first newsletter sent. Start from the beginning if you are new — or jump to the section you need.
On This Page
Get Started
Newsletter Pro is installed like any other WordPress plugin. You download the zip file from your customer center, go to Plugins → Add New → Upload Plugin, select the file, and activate.
Upon activation, the plugin creates its own database tables and adds the Newsletter Pro menu item on the left. It does not affect your posts, pages, or users.
The first thing you should do is set up the sender. Without a sender authorized for your domain, newsletters will end up in spam — no matter how well written they are. So jump to Sending before building your first campaign.
License and Updates
Your license key is in the receipt email and your customer center. Enter it under Newsletter Pro → Settings → License and click Activate.
The license is lifetime. It never expires, and updates are free — they appear automatically under Plugins, just like any other plugin.
The key is tied to the site you activate it on. To move it, release the site in the customer center under Licenses. Test, staging, and development domains do not count against your quota, so you can safely run a production and test environment on one license for a single site.
If the plugin can’t reach the license server, it will keep working. We cache the response for 72 hours and then allow a 14-day grace period, so a network failure on our side never stops your mailings.
Sending and Amazon SES
WordPress’s built-in wp_mail() isn’t made for newsletters. It sends from your web server, which rarely has the reputation needed by recipients — and many providers block ports after a few hundred emails.
Therefore, Newsletter Pro sends via a real email provider. You can choose from Amazon SES, Brevo, Mailgun, Postmark, SMTP2GO, and regular SMTP. We recommend Amazon SES because it’s cheapest at higher volumes and has the best deliverability.
How to set up SES:
- Create an AWS account and go to Simple Email Service.
- Verify your sending domain — not just your email address. Domain verification gives you DKIM keys, which make Gmail trust you.
- Request to leave the sandbox. A new SES account can initially only send to verified addresses and only one email per second.
- Create an IAM user with the
AmazonSesSendingAccesspermission, and copy the keys into Settings → Sending Provider. - Select the region where you verified the domain.
Max emails per second must match your quota with the provider. If you set it higher than allowed, the provider will start rejecting emails, and they will fail in the queue. A new SES account in the sandbox only allows 1 email per second.
Finally, press Send test mail. If it arrives in your inbox, the channel is open.
Contacts and Lists
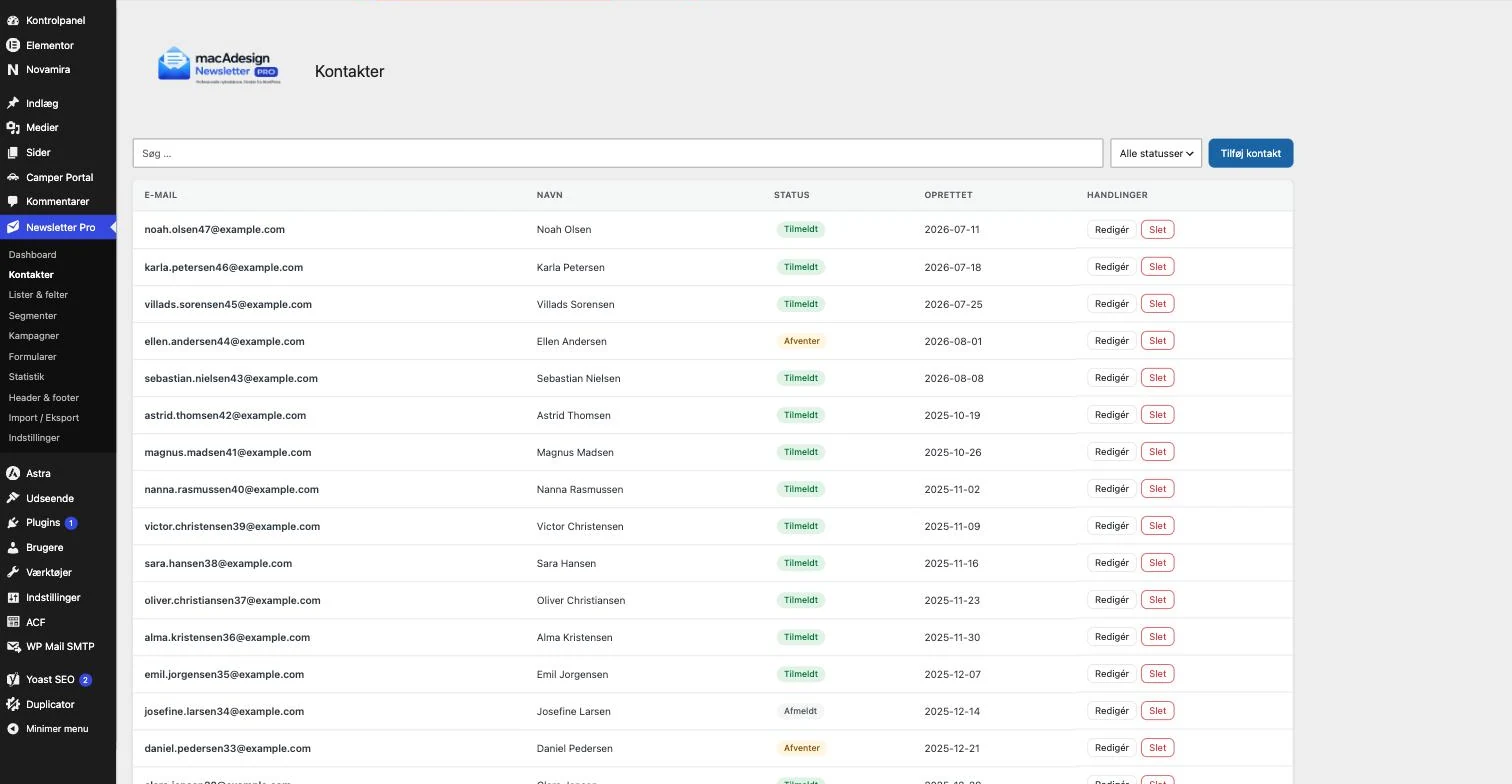
A contact is a person with an email address. A list is a group people subscribe to. A contact can be on multiple lists simultaneously.
Contacts have four statuses: Subscribed (allowed to receive), Pending (not yet confirmed), Unsubscribed (opted out), and Bounced (address doesn’t exist). Only subscribed contacts receive mail — this cannot be disabled and is intentional.
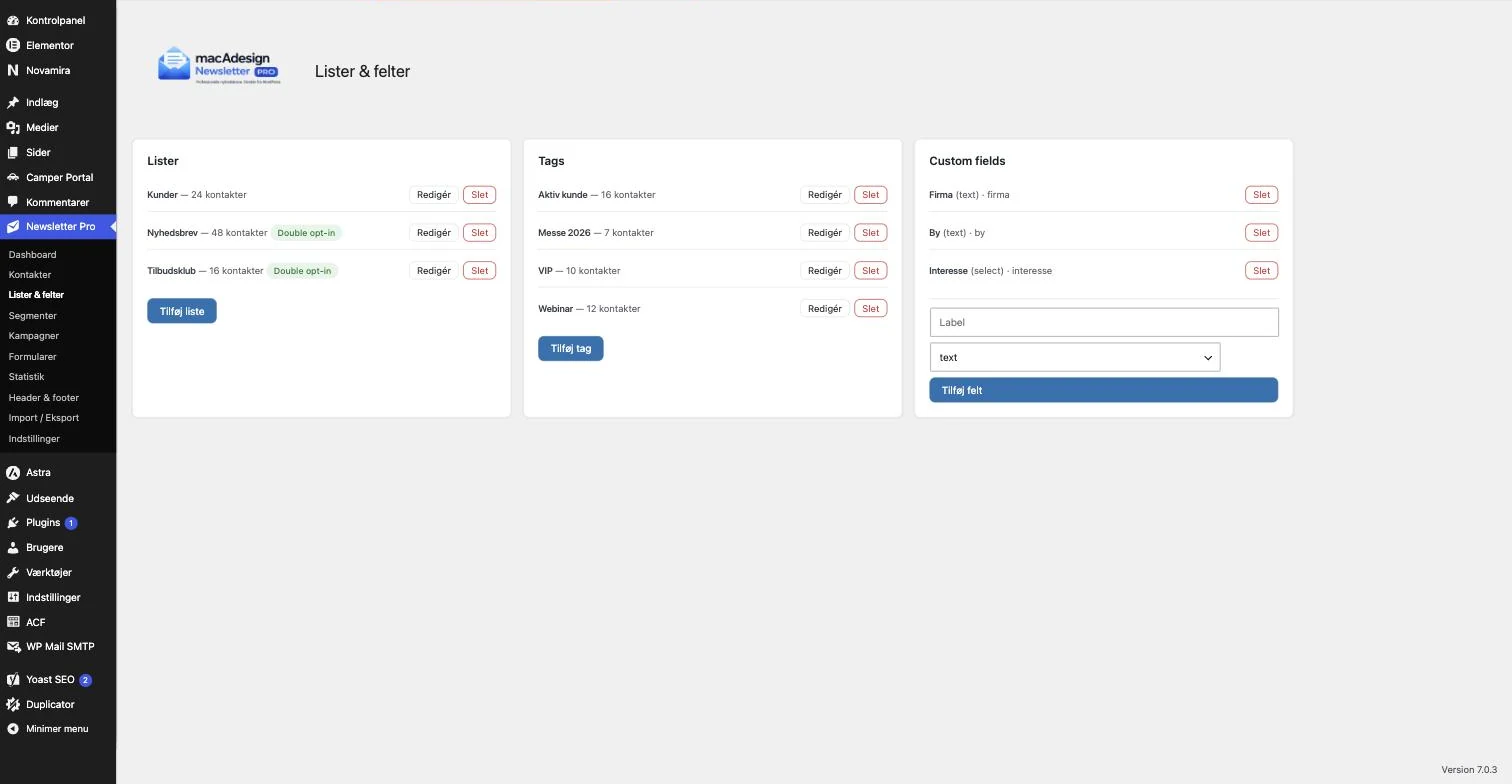
Double opt-in is set per list. If enabled, new subscribers get a confirmation email and only count once they click. It costs some signups but creates a list that truly opens your mails — and this documents consent if anyone complains.
Under Lists & Fields you can also create tags and custom fields. Tags are for your own categorization. Custom fields are extra information like company or city, used both in segments and as merge fields in the mail.
Import is done under Import / Export via CSV files. Imports run in batches so large files don’t overwhelm the server.
Signup Forms
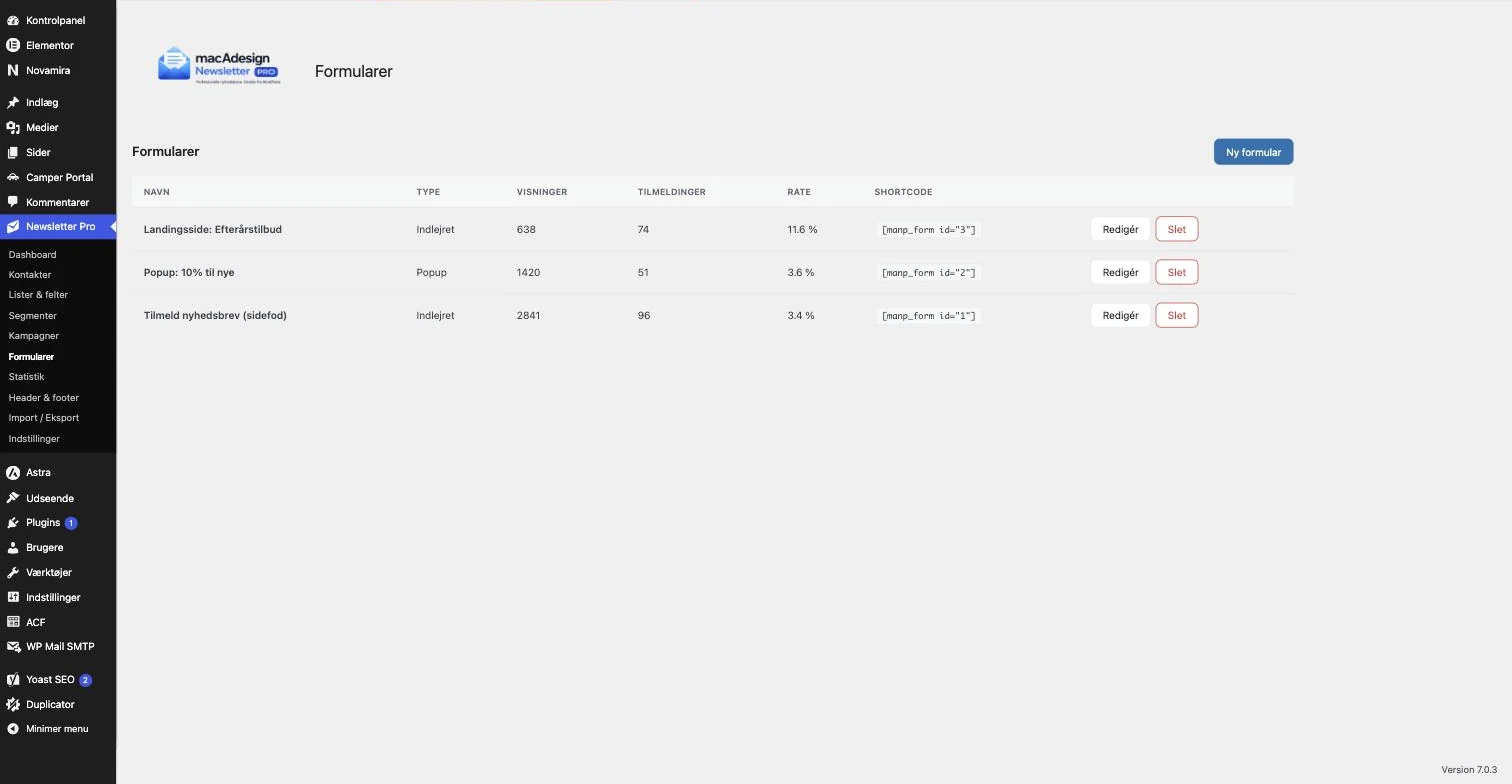
Under Forms, you build the fields people fill out to subscribe. Each form is linked to one or more lists.
You can display it in four places: as a shortcode anywhere, as a Gutenberg block, as an Elementor widget, or as a popup. If you already use Elementor Pro Forms, you can also let an existing form subscribe to the newsletter via an action — so you don’t have to rebuild it.
Each form tracks its own views and signups and shows the conversion rate. It’s the number that tells you whether a popup is worth the effort or just annoying.
The forms have built-in spam protection: a hidden honeypot field and a time limit that rejects submissions faster than a human can type. This requires no CAPTCHA and does not bother real visitors.
Campaigns and Builder
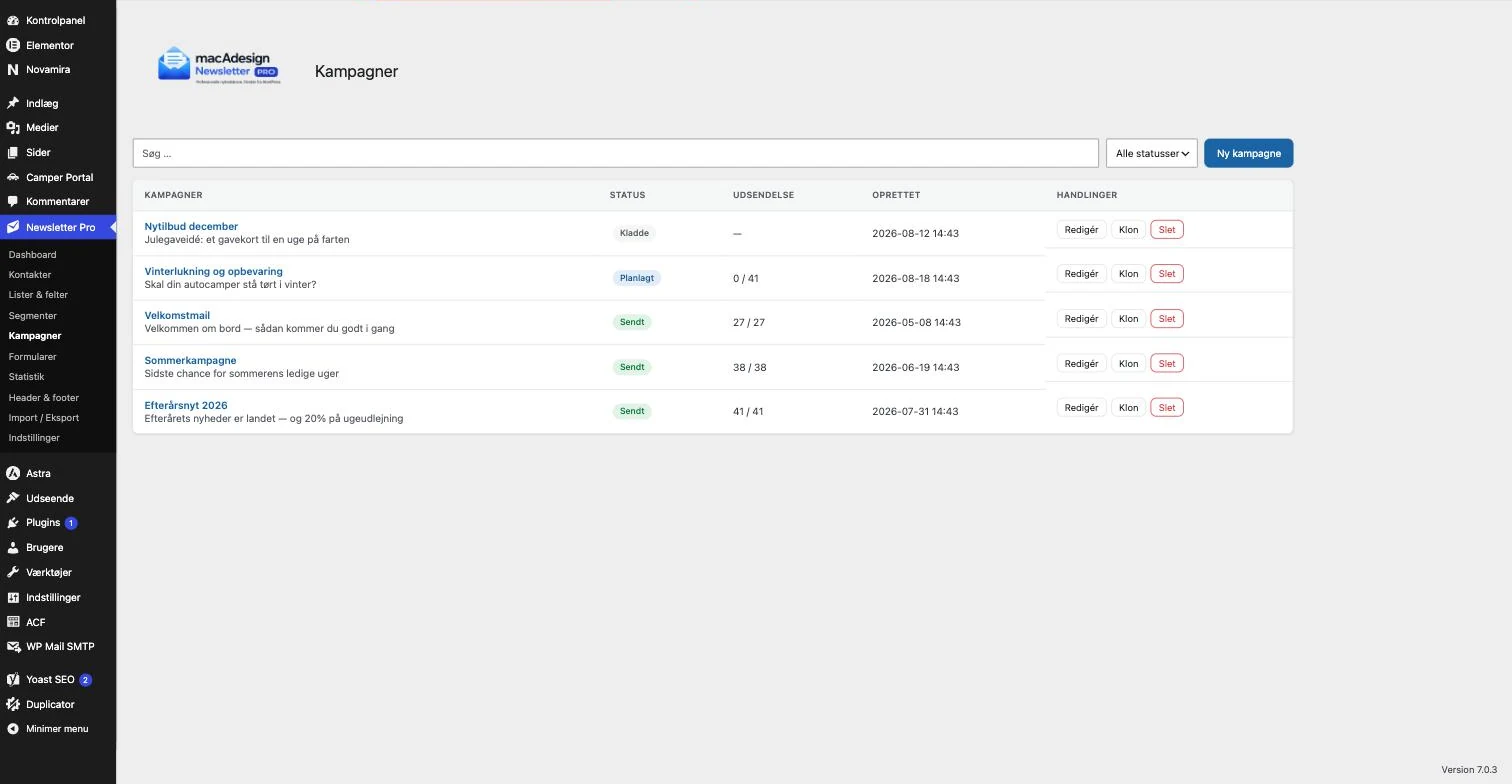
A campaign is a single newsletter. It has four tabs: Content, Recipients, Sender, and Schedule.
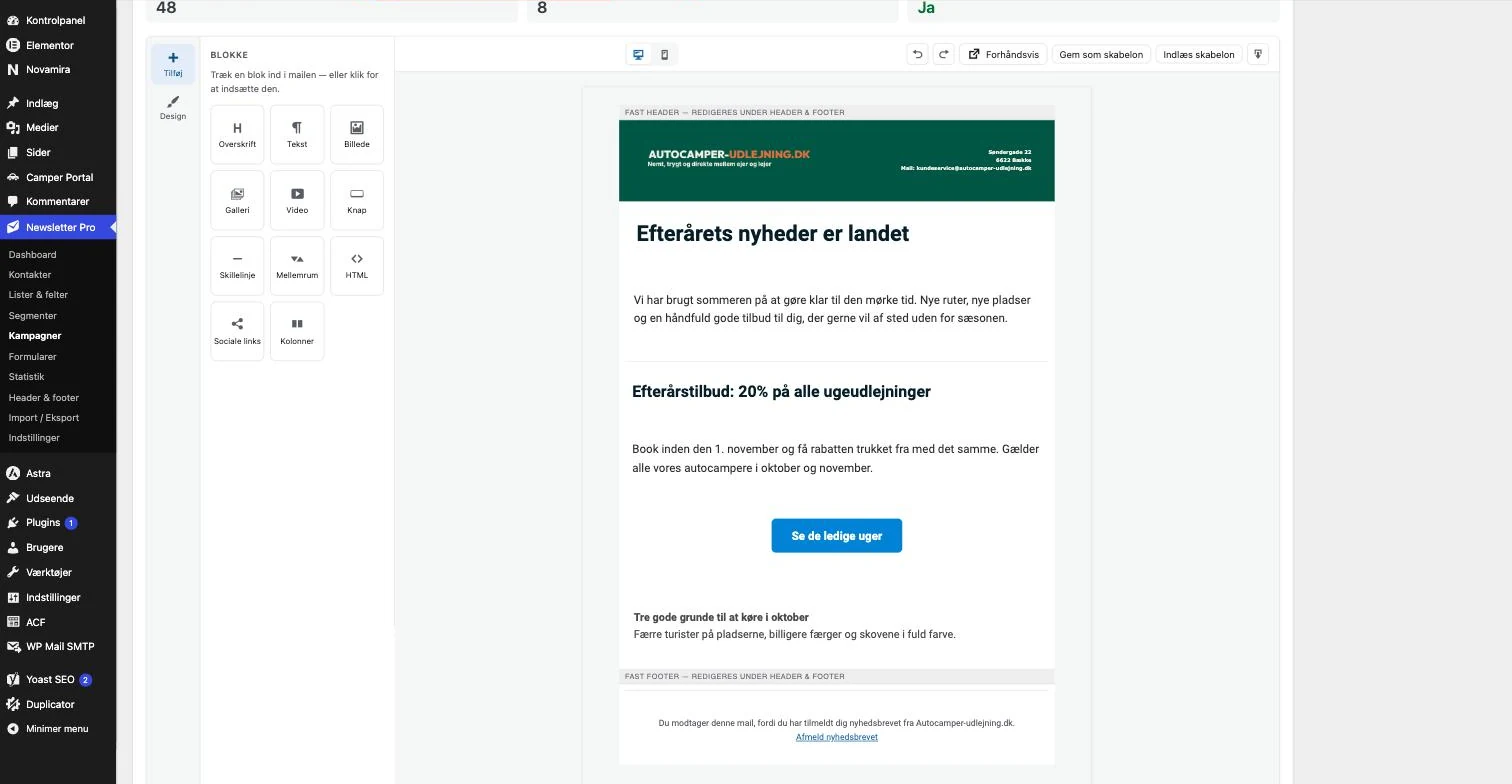
In Content, you build the email by dragging blocks in from the left: headline, text, image, gallery, video, button, divider, spacer, HTML, social links, and columns. Everything is shown as it will be sent, and you can switch between desktop and mobile views at the top.
The header and footer are edited in one place — under Header & Footer — and are automatically wrapped around all campaigns. That’s why they appear gray in the builder: you shouldn’t edit them in each mail. The unsubscribe link is in the footer and cannot be removed.
In Recipients, you select lists and segments. If a contact is in both a list and a segment, they receive only one email.
Always send a test email to yourself first. There’s no undo once 5,000 emails are on their way.
When you click send, the emails are queued and sent at the rate your provider allows. You can close the browser during sending — the sending continues on the server, and you can monitor it on the Schedule tab.
Segments
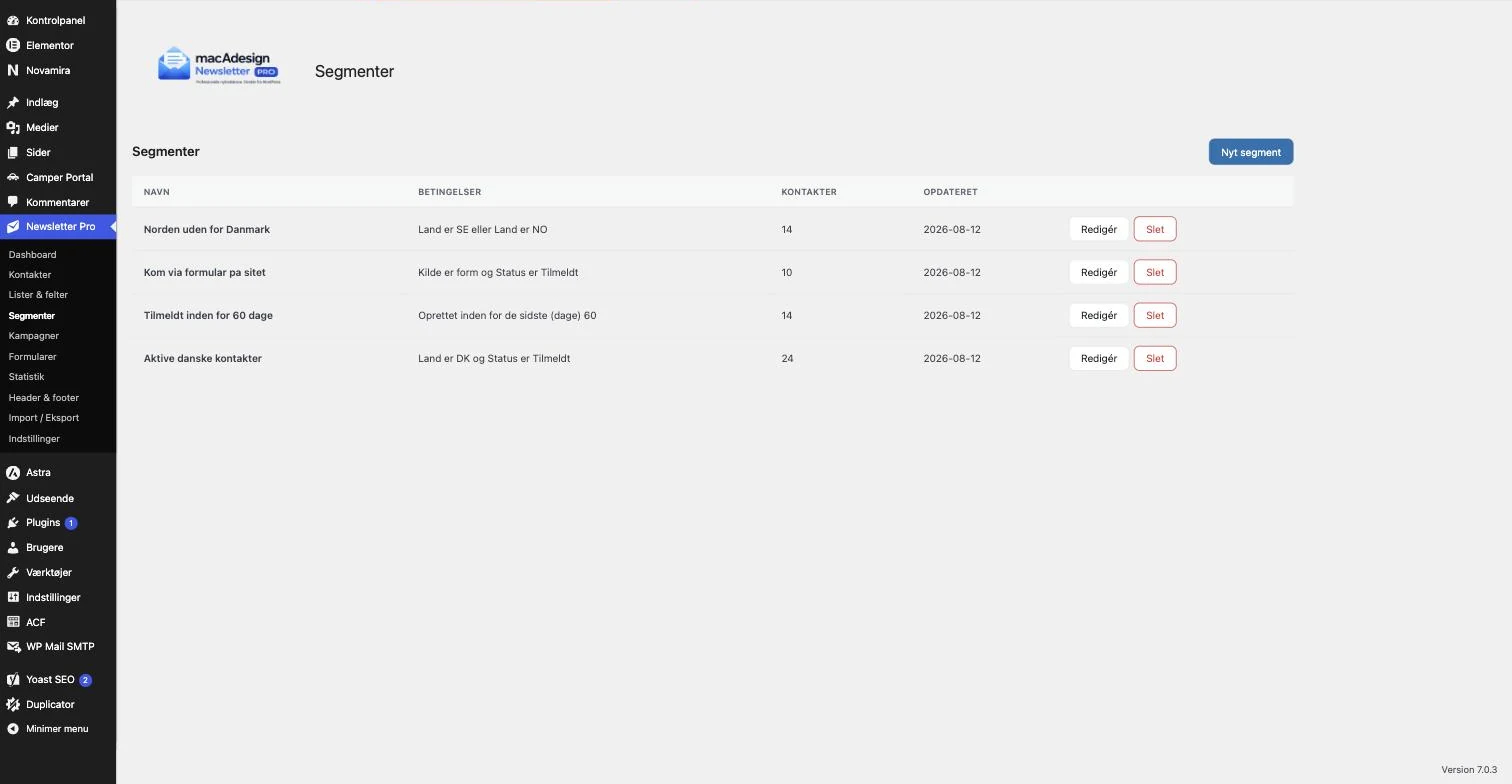
A segment is a self-updating filter. You build it using conditions — country, status, source, subscription date, tags, custom fields — and can choose whether all conditions must be met, or just one.
Unlike a list, a segment is not something you subscribe to. It’s calculated each time you use it. So, the segment “Subscribed within 30 days” will include different people next month, without you having to touch it.
The number shown is the last calculated count. When you open the segment, it recalculates from scratch.
Statistics
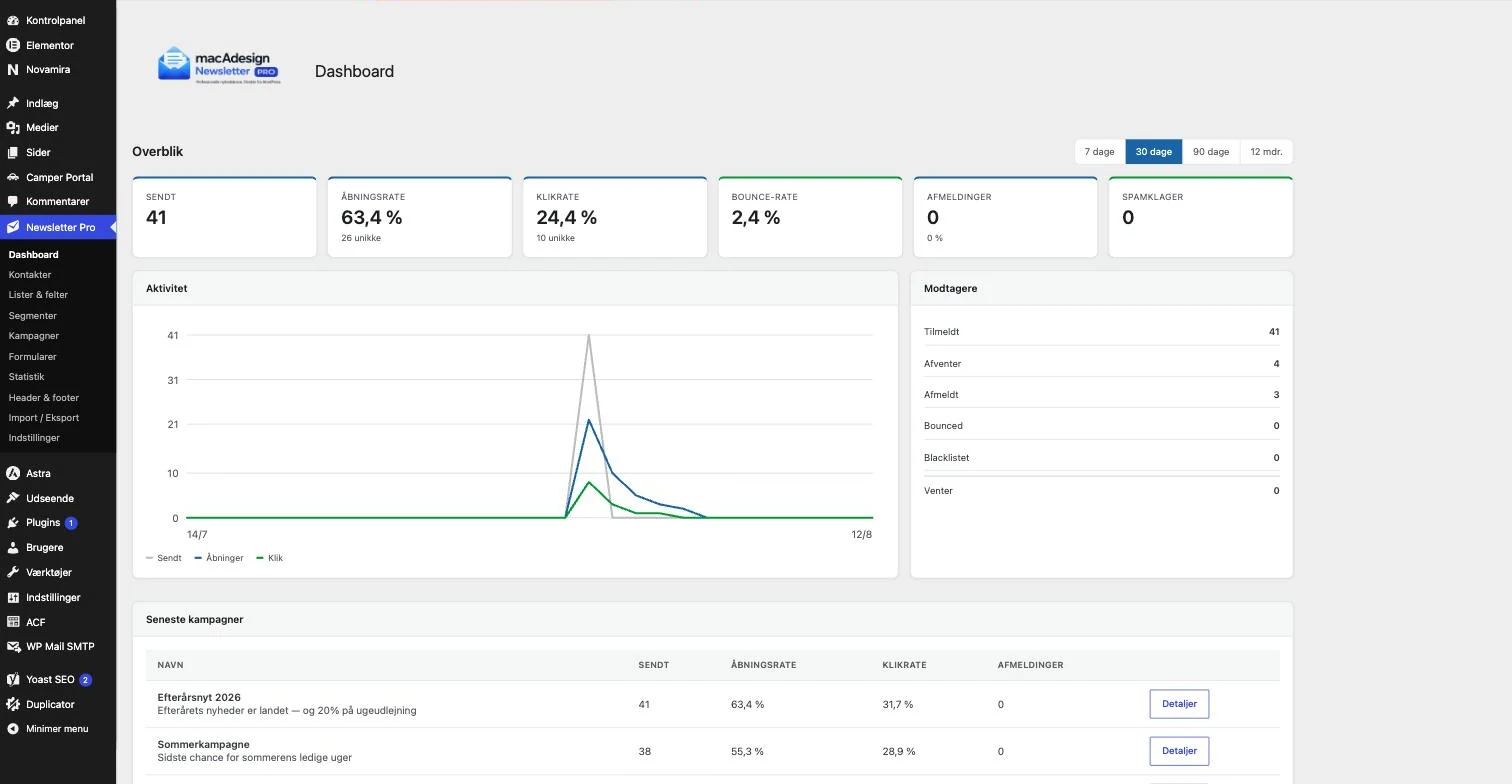
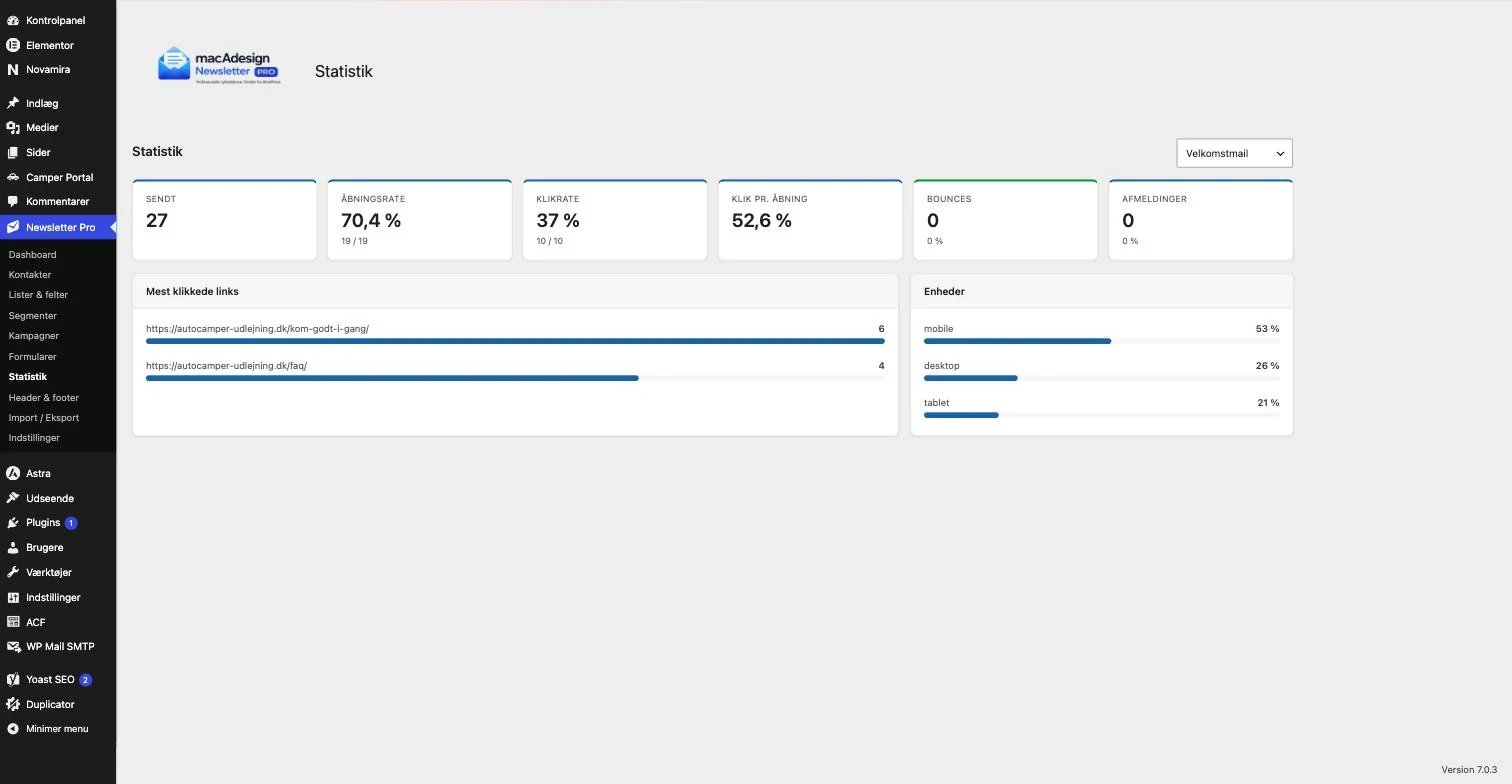
The dashboard shows overall activity, and Statistics displays the numbers for one campaign at a time.
Open rate is measured with an invisible tracking pixel. This number has become less reliable since Apple started preloading images in Mail — some opens are counted even though no one actually viewed the email. Use it to compare your own campaigns over time, not as an absolute truth.
Click rate is much more valuable. It’s measured by rewriting links, and a click requires a person. “Most clicked links” shows you what readers truly wanted.
You can disable both under Settings. If you do, emails are sent without pixels and without rewritten links.
Raw events are stored for 12 months by default and then deleted. Daily totals are always retained so your history remains — only the information about who opened what is removed.
Deliverability: SPF, DKIM, and DMARC
Whether your emails land in the inbox or spam primarily depends on three DNS records on your domain. Without them, no one can tell the difference between you and someone pretending to be you.
SPF specifies which servers may send on behalf of your domain. One TXT record only, and there must be only one SPF record in total — two records invalidate each other.
DKIM cryptographically signs each email. Your provider supplies these records when you verify your domain. This is the most important of the three.
DMARC tells the receiver what to do if SPF and DKIM don’t align. Start with p=none, which only reports, and tighten to quarantine once you see in the reports that everything is properly signed.
If your domain is with Cloudflare, these records must be created there — not in your Webhosting control panel. This is a classic pitfall: the records look fine in cPanel, but Cloudflare is the one the world queries, and the records aren’t there.
Always verify afterward with a lookup tool that the records actually respond from outside.
Troubleshooting
Emails get stuck in the queue and don’t send. The queue is managed by WordPress’ cron, which only runs when someone visits the site. On a quiet website, this can take a long time. The solution is a real cron job on your Webhosting that calls wp-cron.php every minute.
Emails end up in spam. Nine out of ten times, DKIM is missing. See Deliverability. Also check that the sender address is on the domain you verified — a Gmail address as sender will never work.
The test email fails. The error message comes from your provider and is usually precise. “Email address not verified” means you are still in SES’ sandbox. “Failed to connect” usually means an incorrect host or port.
Contacts do not import. The file must be UTF-8 and comma-separated. Excel saves by default with semicolons and latin-1 — choose “CSV UTF-8” when saving.
You cannot open the plugin. If it says “Unfortunately, you do not have permission,” your user role lacks the rights. They are granted upon activation — deactivate and reactivate the plugin to restore them. Your data is not touched.
The open rate looks wrong. See the section on Statistics. Apple Mail preloads images and inflates the number.
Privacy and Data
All subscribers, campaigns, and statistics are stored in your own database. No data is sent to us — the plugin only contacts our server to check the license and fetch updates.
Newsletter Pro is integrated with WordPress’ own privacy tools. If someone requests insight or deletion under Tools → Export Personal Data, newsletter data is included automatically.
IP addresses are stored as one-way hashes, not in plain text. They’re used for spam protection and to document consent — not to identify individuals across websites.
If you uninstall the plugin, you can choose whether the data stays or is deleted. The default is to keep it, so a misclick doesn’t cost you your list.